Magical Beverage Ideas
- Unicorn Lemonade
- Ingredients: Lemonade, blue and pink food coloring, edible glitter.
- Recipe:
- Prepare lemonade and divide it into two pitchers.
- Add a drop of blue food coloring to one and pink to the other.
- Pour both colors simultaneously into clear cups for a layered effect.
- Sprinkle edible glitter on top for sparkle.
- Presentation: Serve in clear cups with pastel straws and a mini unicorn cutout attached.
- Fairy Punch
- Ingredients: White grape juice, lemon-lime soda, rainbow sherbet.
- Recipe:
- Mix equal parts white grape juice and lemon-lime soda in a large punch bowl.
- Add scoops of rainbow sherbet, which will fizz and float.
- Stir gently to create a swirling effect.
- Presentation: Serve in clear cups with flower-shaped stirrers.
- Dragon’s Breath Fizz
- Ingredients: Orange soda, grenadine, whipped cream, cherry.
- Recipe:
- Fill a cup ¾ full with orange soda.
- Add a splash of grenadine for a fiery red hue.
- Top with whipped cream and a cherry.
- Presentation: Serve with dragon-themed drink toppers or flags.
- Royal Tea (Iced or Hot)
- Ingredients: Herbal fruit tea (hibiscus or berry), honey, lemon slices.
- Recipe:
- Brew fruit tea and let it cool for iced tea, or serve warm for a tea party feel.
- Sweeten with honey and garnish with lemon slices.
- Presentation: Serve in small tea cups or princess-themed mugs.
- Enchanted Potion Bottles
- Ingredients: Grape juice, apple juice, sparkling water.
- Recipe:
- Mix equal parts grape juice and apple juice, then top with sparkling water.
- Pour into small clear bottles with cork tops.
- Add labels like “Potion of Courage” or “Elixir of Magic.”
- Presentation: Tie ribbons around the bottle necks and add a paper tag with a potion name.
- Rainbow Milk
- Ingredients: Milk, food coloring, whipped cream, sprinkles.
- Recipe:
- Divide milk into separate bowls and color each with food coloring (red, orange, yellow, green, blue, purple).
- Layer the colors in clear cups.
- Top with whipped cream and sprinkles.
- Presentation: Serve in cups with rainbow-themed straws.
- Mermaid Lagoon Water
- Ingredients: Blue sports drink, sparkling water, edible pearls.
- Recipe:
- Mix equal parts blue sports drink and sparkling water.
- Add a few edible pearls to the glass for a bubbly effect.
- Presentation: Serve in tall clear glasses with umbrella stirrers.
- Knight’s Mead (Apple Juice Blend)
- Ingredients: Apple juice, pear juice, cinnamon.
- Recipe:
- Warm apple and pear juice in a pot.
- Add a pinch of cinnamon for flavor and let it cool before serving.
- Presentation: Pour into small wooden mugs or medieval-style cups.
- Pixie Dust Spritzers
- Ingredients: Lemon-lime soda, cranberry juice, edible glitter.
- Recipe:
- Mix 2 parts lemon-lime soda with 1 part cranberry juice.
- Stir in a pinch of edible glitter for sparkle.
- Presentation: Serve in clear cups with glitter-coated rims.
- Frozen Castle Slushies
- Ingredients: Ice, fruit punch, lemonade.
- Recipe:
- Blend ice with fruit punch for one slushy batch and lemonade for another.
- Layer the slushies in clear cups for a two-tone effect.
- Presentation: Add a straw with a small crown or castle cutout.
General Tips for Presentation:
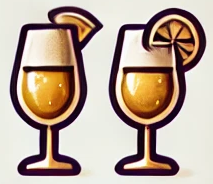
- Use clear cups or bottles to showcase colors.
- Decorate with themed drink toppers, paper straws, or ribbon.
- Label drinks with whimsical names like “Knight’s Nectar” or “Fairy Fizz.”
- Add small props like toy crowns or figurines near the drink station.
Creating whimsical drink labels for your Princess/Fairytale-themed party is simple and fun! Here’s a step-by-step guide:
Materials Needed:
- Cardstock or Heavy Paper: Choose pastel, glittery, or metallic colors to match the theme.
- Printer: Optional if you want to print pre-designed labels.
- Scissors: Regular or decorative-edged scissors.
- Hole Punch: For attaching labels to bottles or cups.
- Ribbon or Twine: To tie the labels onto drink containers.
- Markers or Pens: Metallic pens (gold, silver) work great for writing names.
- Stickers or Stamps: Crowns, stars, fairies, or other themed designs.
- Glue or Tape: For attaching labels directly to bottles or cups.
Step-by-Step Instructions:
- Design the Labels:
- Shape Ideas:
- Crown, castle, star, shield, or oval/rectangular frames with decorative edges.
- Name Ideas:
- “Unicorn Lemonade”
- “Dragon’s Breath Fizz”
- “Potion of Happiness”
- “Pixie Dust Spritzer”
- Optional Tools: Use software like Canva, Microsoft Word, or Google Docs to design labels with clip art and fancy fonts.
- Print or Write Names:
- Printed Labels:
- Print your designs onto cardstock.
- Handwritten Labels:
- Use metallic pens to write whimsical names. Add swirls or stars for embellishment.
- Cut Out the Labels:
- Cut around your designs. If you’re using a decorative-edged scissor, it will add a nice touch.
- For more intricate shapes (like a crown or castle), use a craft knife for precision.
- Attach the Labels:
- Option 1: Tie-On Labels
- Punch a hole at the top of the label.
- Thread ribbon or twine through the hole and tie it around the bottle neck or cup handle.
- Option 2: Sticker Labels
- Print labels on adhesive paper or use glue/tape to attach them directly to the drink containers.
- Option 3: Tent Labels
- Fold cardstock into a small tent shape and place it next to the drinks on the table.
- Decorate the Labels:
- Add stickers, small gems, glitter, or stamps for extra flair.
- Use themed embellishments like mini crowns, stars, or fairy wings glued to the corners.
Advanced Ideas:
- Chalkboard Style:
- Use black cardstock and write drink names with a white chalk marker.
- Mini Scrolls:
- Roll your labels into small scrolls tied with ribbon for a medieval touch.
- Bottle Tags:
- Wrap each bottle or cup with a wide ribbon and attach the label in the center.
Display Ideas:
- Place all labeled drinks on a decorated “Royal Refreshments” table.
- Add themed props like toy castles, fairy lights, or small crowns to the drink station.